
Prof. Dr. Kaniz Farhana Professor Department of Apparel Engineering Bangladesh University of Textiles.
Abu Shadate Faisal Mahamude Ph.D. (UMPSA, Malaysia) MBA (BUTEX, Bangladesh) B. Sc. (DU, Bangladesh) DGM (Dyeing and Finishing; Cotton Club Ltd, Bangladesh)
Md. Abu Sayem M. Sc (First class first), RU, Bangladesh GM, Embellishments, Tropical Knitex Ltd Mondol group
These days, printing processes are crucial tactics for producing knitted apparel that is both stylish and visually appealing to consumers. Localized dying on textile materials is the general name for printing. Printing processes can be prepared in a variety of ways and styles. Only recently developed clothing printing processes have been used in this study to meet the needs of modern customers as follows:
Discharge printing
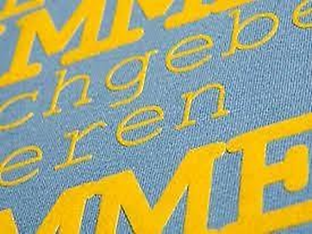
In textiles, discharge printing is a process that involves applying a chemical or bleaching agent to a colored fabric to “discharge” the color from certain regions. In contrast to the original-colored fabric, the resulting design or pattern seems lighter or whiter. This technique is frequently applied to colored or dark textiles to produce complex patterns with a striking contrast. This technique is particularly well-liked for producing intricate designs, particularly on cotton and other cellulosic materials. It is frequently used to create distinctive, superior prints in home textiles and fashion.
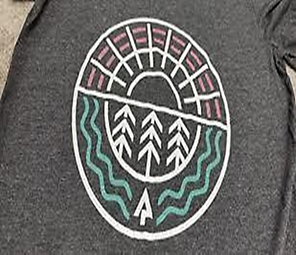
Discharge printing style
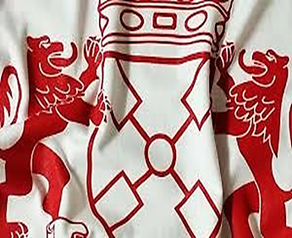
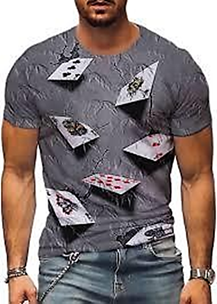
Crack Print
The term “crack print” describes a fabric printing method that produces a damaged or cracked appearance. This effect usually gives the artwork the appearance of fine fractures that run through it, giving it a weathered or aged appearance. It is frequently accomplished by applying a color or pattern to a base material using specialized printing or dyeing techniques, which cause the material to crack or peel after application, producing an uneven, textured surface. Prior to printing fabric must be starch free.
Making Printing Paste: Use rubber/plastisol ink or combine final color pigment with crack binder (for water-based printing). printing on a screen, using a screen, apply a thick coating of ink or binder to the fabric. For good cracking, even application is crucial. drying somewhat, use a low-temperature drier or let the print air dry. Curing the Crack Effect Carefully heat set for two to three minutes at 150 to 170°C (300 to 340°F) in a curing oven or heat press. This phenomenon results from the binder shrinking and cracking when heated. After Processing, Rinse and pat dry. Use a softener to make the handle duller if you’d like.
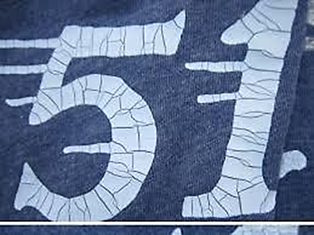
Crack printing style
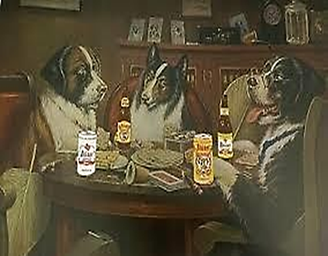
Foil Print
A heat-transfer printing method called foil printing gives fabric a shiny, metallic, and reflecting appearance. This technique is frequently used to create a posh and striking look to home textiles, sportswear, and fashion.
The process of foil printing involves transferring metallic foil onto fabric with a particular adhesive and heat in a step-by-step manner. Because it produces a glossy, reflected surface, it is frequently used in home textiles, sportswear, and fashion.

Foil printing style
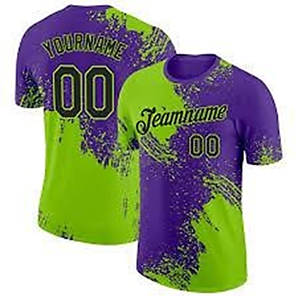
Glitter Print
Employing glitter particles combined with an adhesive or binder, glitter printing is a decorative printed textile process that gives fabric a textured, glossy, and glittering appearance. To improve visual appeal, it is frequently utilized in fashion, sportswear, party wear, and promotional clothing. Using a distinctive adhesive (binder/glue) and heat curing to assure durability, glitter particles are adhered to cloth in the glitter print method, which is based on the principles of adhesion and heat fixation. The following are the processes:
✔ Adhesive application → ✔ Glitter attachment → ✔ Heat curing → ✔ Excess glitter removal → ✔ post-treatment (optional).
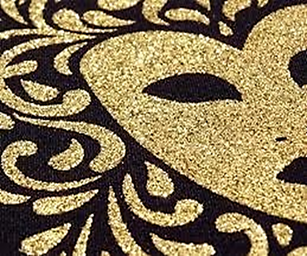
Glitter printing style
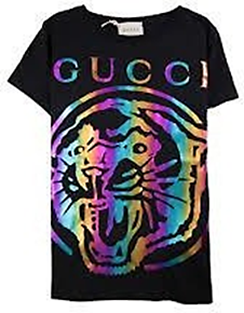
Metallic Print
Metallic printing is a textile printing method utilizing metallic pigments, inks, or foils to give cloth a bright, reflective, and metallic aspect. The result is that clothing, sportswear, and home textiles seem more upscale and fashionable. For instance, to produce a glossy, reflecting effect, metallic pigments, inks, or foils are attached to fabric using the adhesion, heat fixation, and surface reflection principles. Summary of the process flow:
✔ Adhesive/ink application → ✔ Metallic material bonding → ✔ Heat fixation → ✔ Cooling & excess removal → ✔ Durability enhancement (optional).

Metallic printing style
Puff print
Puff printing is a special screen-printing technique where a puff additive is mixed with plastisol or water-based ink to create raised, 3D effects on fabric after heat curing. It gives the design a soft, foam-like, and slightly textured appearance.
Puff Print process: The puff print process is based on the principles of thermal expansion, adhesion, and controlled curing, where a puff additive mixed with ink expands when exposed to heat, creating raised, 3D effects on fabric. Summary of the process flow
✔ Puff ink application → ✔ Heat activation → ✔ Ink expansion → ✔ Cooling & durability check
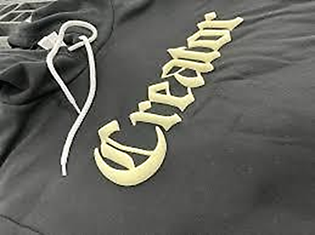
Puff printing style
Flock Print
To give fabric a velvety, suede-like texture, small threads called flock are adhered to the fabric using the flock printing technique. Fashion, sportswear, home textiles, and branding (lettering and logos) all frequently employ it. The technique of flock printing involves applying glue to fabric to create a raised, velvet-like texture using small flock fibers, typically made of nylon, rayon, or polyester. It is based on the concepts of adhesion, electrostatic attraction, and heat fixation. Summary of the process flow
✔ Adhesive application → ✔ Flock fiber application → ✔ Electrostatic attraction (optional) → ✔ Heat curing → ✔ Excess fiber removal
Flock printing style
Silicon Print
A cutting-edge method of printing textiles, silicone printing uses inks based on silicone to produce prints that are resilient, soft, and have a high degree of flexibility. It is frequently utilized in performance clothing, sportswear, activewear, and luxury fashion. The silicone print process is an outstanding performance textile printing technique that produces soft, flexible, and long-lasting designs on fabric by using inks based on silicone. A detailed instruction on creating high-quality silicone prints may be found below.
✔ Ink adhesion → ✔ Elastic expansion → ✔ Layer-by-layer build-up → ✔ Thermal curing → ✔ Final durable finish

Silicon printing style
Gel Print
Thick, glossy, translucent or semi-transparent inks are used in the textile printing process known as gel printing to give cloth an embossed, raised, or wet-look appearance. Plastisol-based or silicone-based gel ink, which offers a 3D, glossy, and smooth finish, is commonly utilized as the ink.
Gel Print Process: Using plastisol or silicone-based gel inks, gel printing is a special effect printing technique that offers cloth a raised, glossy, wet-look, or embossed texture. The detailed procedure for producing high-quality gel prints is provided below.
✔ Ink adhesion → ✔ Viscosity control → ✔ Layer-by-layer buildup → ✔ Flash drying → ✔ Final heat curing → ✔ Glossy, raised finish

Gel printing style
High Density Print
A specific screen-printing method called high-density (HD) printing gives cloth a thick, elevated, and three-dimensional appearance. It is accomplished by using a thick, high-tension stencil screen to apply multiple coats of high-viscosity plastisol, silicone, or water-based ink. High Density Print Process: High-density (HD) printing is a special effect screen printing technique that creates a raised, 3D embossed effect using thick layers of plastisol, silicone, or water- based ink. For crisp, structured designs, a high-tension stencil, several print layers, and controlled curing are necessary. Process is as follows:
✔ Thick ink application → ✔ Layer-by-layer buildup → ✔ Stencil precision → ✔
Flash drying between layers → ✔ Final heat curing → ✔ Durable 3D effect
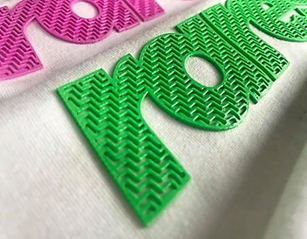
High density printing style
UV Color Change Print
A special effect textile printing method called UV color change printing, or photochromic printing, causes the printed design to change color when it is subjected to ultraviolet (UV) radiation, like sunshine. Photochromic pigments or dyes, which are colorless or light-colored inside but turn vibrant when exposed to UV light, are used to create this effect. The print progressively reverts to its initial condition after being exposed to UV radiation. Moreover, Photochromic pigments or dyes, sometimes referred to as UV color change printing or photochromic printing, are colorless or light-colored indoors but change color when exposed to UV light, or sunshine. These unique inks are applied to fabric using screen printing or heat transfer techniques.

UV color change printing style
Reflective Print
Utilizing light-reflecting inks, reflective printing is a special effect textile printing method that produces designs that, when exposed to light sources like camera flashes, flashlights, or automobile headlights, shine or glow. The print is made extremely visible in low light by reflecting light back to its source using retroreflective pigments or tiny glass beads placed in the ink. Light-reflecting inks or films are applied to cloth using the specialized screen printing or heat transfer technique known as “reflective printing.” When exposed to light sources like headlights or flashes, the ink’s microglass beads or retroreflective pigments reflect light back to their source, giving the impression that it is glowing in the dark.
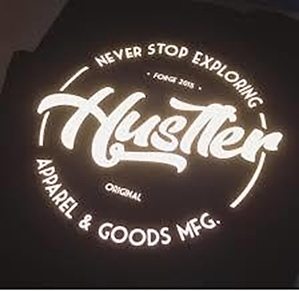
Reflective printing style
Glow in the Dark Print
Using phosphorescent pigments to absorb light and then produce a glowing effect in the dark, glow-in-the-dark printing, often referred to as glow in the dark printing (also known as phosphorescent printing), is a specialist screen printing process. Photo-luminescent inks, which charge in the presence of light sources such as sunshine, UV, or artificial light, are used to create this effect. The inks glow in the dark for a predetermined amount of time before fading.
Glow in the dark Procedure for Printing: A special effect screen printing method called glow-in-the-dark printing, or phosphorescent printing, uses photo-luminescent pigments to apply to cloth. These pigments give off a glowing appearance in the dark after absorbing light, whether it is UV, sunshine, or artificial light.
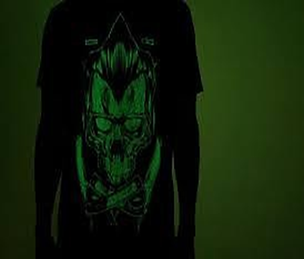
Glow in the dark printing style
Lacquer Print
Lacquer printing is a textile printing method that gives cloth a glossy, lustrous, or semi-transparent appearance using inks based on lacquer. It offers a high-gloss, rubbery, or plastic-like finish that gives the print a distinctive, wet-look appearance. When a smooth, glossy surface is sought, lacquer printing is frequently employed in ornamental textiles, fashion, and branding.
Process of printing textiles with lacquer: Lacquer printing is a specialized technique that applies inks based on lacquer to give cloth a glossy, semi-transparent, or plastic-like appearance. It adds a glossy, smooth, and somewhat elevated texture to designs.
Lacquer printing style
Screen printing with plastisol ink, a PVC-based ink that doesn’t dry at room temperature, is known as plastisol printing. For a durable bond with the cloth, heat curing at 150–170°C (300–340°F) is necessary. For printing on textiles that are strong, vivid, and durable, this technique is frequently employed. Procedure for Plastisol Printing: Plastisol printing is a screen-printing method that produces prints with exceptional opacity, durability, and vibrancy using PVC-based plastisol ink. Plastisol ink requires heat curing to create a permanent bond with the fabric because it does not dry at ambient temperature.
Plastisol printing style
Shiner Print
A glossy, shining, or reflecting look is produced on fabric surfaces using the textile printing method known as “shiner print.” Special light-reflecting inks, foils, or coatings are used to create this effect, which gives the design a glossy, metallic, or wet-look finish.
Shiner Print Process: Shiner printing uses certain inks, foils, gels, or coatings to give cloth a glossy, reflecting, or metallic appearance. Depending on the approach taken, the procedure changes.
Shiner printing style
3D Brush Print
This technique gives textiles a three-dimensional, artistic appearance that highlights the design and gives it a hand-painted feel. 3D Brush print process:
Preparing design: Produce a high-resolution brushstroke-style design.
Fabric preparation: Select blends, cotton, or polyester, and pre-treat if necessary.
Printing: Use digital or screen-printing techniques to apply specialized thick paste or ink.
Drying and curing: To fix the ink and improve the 3D effect, use heat or UV curing. Final finishing includes washing, softening, and a durability quality check.
3D brush printing style
Multi-Colored Foil Print
Multi-Color Foil Print is a unique heat transfer printing method that produces a bright, reflecting, and striking image on cloth by applying metallic foils in various colors. This technique creates a gradient, pattern, or layered metallic impression by combining two or more foil colors in a single design, in contrast to single-color foil printing. Printing process:
Design preparation: Produce a high-resolution, multi-coloured foil layout.
Adhesive printing: Use screen printing to apply a unique adhesive to fabric.
Applying foil: Cover the adhesive with foils of various colors in a predetermined order.
Heat pressing: This technique transfers foil onto fabric by applying high pressure and heating.
Peeling and finishing: Take off any extra foil and make sure it adheres smoothly.
Multi-coloured oil printing style
3D Inject Print
A sophisticated textile printing method called 3D Inject Print makes a raised, three-dimensional design on fabric. This gives the textile surface a high-definition, embossed appearance by injecting it with specific thickened inks, gels, or polymers. Printing process:
Design preparation: Make a 3D artwork using layers that is high-resolution.
Fabric pre-Treatment: Get the cloth ready for improved ink adherence.
Ink injection: Use specialized inject-printing procedures to apply thick layers of ink, gel, or polymer.
Curing process: To fix and harden the print, apply heat or UV light.
Final touches: Extra coats to improve texture and durability
3D inject printing style
Temperature Change Print
Thermochromic printing, sometimes referred to as temperature change printing, is a unique textile printing method that makes use of thermochromic inks, which are pigments that undergo color changes in response to temperature changes. The fabric changes color when the temperature varies, but it returns to its original color when the temperature stabilizes. This effect is transient and reversible. Printing process as below
Design creation: Select hues and artwork that will alter in response to temperature changes.
Fabric preparation: To improve ink adhesion, pretreat the fabric.
Mixing thermochromic ink: Get heat-sensitive pigments and binders ready.
Digital or screen printing: Use digital or screen-printing methods to transfer thermochromic ink onto fabric.
Curing and fixation: To set the ink for durability, apply heat treatment.
Testing: Prior to final manufacture, examine temperature sensitivity and color-changing effects.
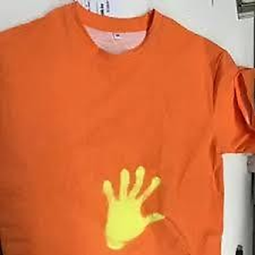
Temperature change printing style
Sonic Print
Sonic Print is a cutting-edge printing method that transfers graphics onto fabric using heat-based technology or ultrasonic vibrations. To create textured, raised, or cut-out effects, patterns are bonded, embossed, or sliced into fabrics using sound waves or thermal radiation rather than conventional ink-based techniques. Printing process as follows:
Design creation – Prepare digital artwork for embossing or cutting.
Fabric selection – Choose synthetic or blended fabrics (Best for sonic processing).
Ultrasonic or heat application – Apply sound waves or heat energy to imprint or cut the design.
Cooling and fixation – Allow fabric to settle and strengthen the pattern.
Finishing touches – Check for quality, trim excess material, or enhance the texture.
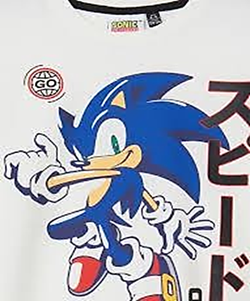
Sonic printing style
Rectangular Print
The term “rectangular print” describes a textile printing technique in which the design is applied in a rectangular format. A variety of printing methods, including block printing, sublimation, digital printing, and screen printing, can be used to accomplish this. The rectangle-shaped design might be an image framed inside a rectangular space, a solid block, or a pattern with borders. Rectangular printing follows these general phases, though they vary depending on the technology used:
Design preparation: Produce a digital artwork in the shape of a rectangle.
Fabric selection: Pick the right fabric (Blends, cotton, or polyester).
Choose from sublimation, heat transfer, digital printing, or screen printing as your printing method.
Application of ink or dye: Use the chosen method to apply ink.
Curing and fixation: The print can be fixed by steaming, UV curing, or heat pressing. Verify color accuracy and crisp rectangular edges during the quality check and finishing process.
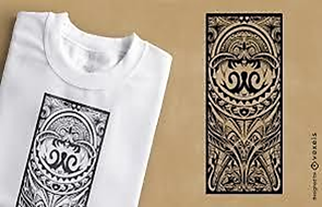
Rectangular printing style
Excellent article about printing at present factory.
Very nice text, most practical and smart learning material for beginners
This is vary nice work. .
Nice post regarding printing and their techniques. Also expecting to have some post on the limitations of various print techniques and outcomes. Thanks